Wednesday, 25 April 2012

Dreamweaver workshop two.

HTML; hyper text mark-up language.
To make a website you need;
<HTML></HTML>
<TITLE></TITLE>
<BODY></BODY>
<HEAD></HEAD>

Order; <HTML><HEAD><TITLE></TITLE></HEAD><BODY></BODY></HTML>

PHP; applied to sites like amazon that have a lot of products on them. 

You can view the code of any website in the world to see how complicated the design is. 


The first image to ever be posted online once people figured out how. 

To set-up our folder from the ones we've made. 


Whenever websites are created the first page needs to be called index.html.
To view codes to edit click on 'code'. 


The website progress can be previewed by clicking on the globe symbol.

Options to work with css. 


Type body and space, to get type options press shift and {.
Then start typing font and choose font family. 


To close each section add a semi colon. 
Once the body is done go to the next line and type }.


Icon to link the stylesheet to the website. 


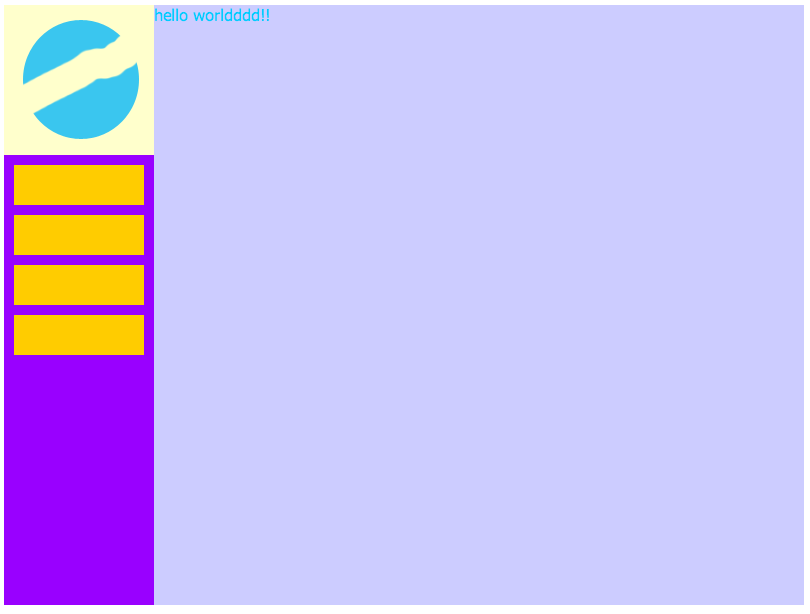
To create a div start with #wrapper.
If you indent type it causes less confusion.
If you want something to have a solid background, make it transparent in photoshop and add colour code in dreamweaver. 


To save it as transparent use PNG-24.
With no transparency use JPEG (in photoshop) 


Dreamweaver workshop one; SCAMPS.

The task we were given in the first dreamweaver workshop was to create some of our own scamps that we could then use when it comes to designing our own website as a template. Usually you design two or three but I did a few more just to give myself more scope for design and ideas. I want to take quite a minimalistic approach to my own website with few buttons to other pages and an overall simplistic design. The sections indicate buttons to other pages and the box with a cross is where the logo and any other imagery would lie (in some designs just the logo). I also included a basic site map of the pages I would have that would be linked to the homepage. 

Dreamweaver workshop one.


Aims; 
- Identify website purpose.
- Identify target audience. 
- Identify audience needs. 
- Demonstrate an understanding of interface and layout techniques. 

Purpose; 
- To showcase your work.
- To get work. 
- Employment opportunities.

Target audience; 
- Design studios 
- Corporate clients 
- Events 
- Independent buyers
- Collaborators 
- Like minded people

Audience needs; 
- Overview of work
- Contact details

Which target audience are you targeting?

Look at exsisting websites for personal area of interest. 
SCAMP - quick layout of a website design. Usually produce around three different designs and annotate them. 
SITE MAP - showcases the content of the website (different pages). 
Can ask clients for sites they like as inspiration. 

Choose a website and write the first things that come to mind... 
Apple; clean, technological, innovation. 
Legwork; illustrative, plain, dull, bland. 
My own bike; weird, european, intruiging, minimal. 
Slavery footprint; too happy, layout, minimal. 
No limite arcades; horrible, tacky, busy, garish. 
Evangelical catherdral; confusing, strange, busy. 
Ling cars; horiffic, too much, bad movement, confusing. 
Olly Moss; what?, very minimal, intriguing. 
Vicki and Laura; different, simplistic, horizontal. 

There are certain web standards that need to be stuck to in terms of size, width, font etc. 
Avoid animation. Try and use a maximum of five links. 
Your work should be the focus and the website should be basic. The work should speak. 
Lightbox - a tool in which video can appear over the top of something else. 
AWWWARDS - links out to award winning websites for inspiration. 

Websites I found that are 'different': 
www.kinetic.com.sg
www.duplos.org
www.timburton.com
www.momentskis.com
www.ultranoir.com

The navigation of a website should never move. Try and fix the navigation. 
Make sure networking is applicable to getting a job. 

For a website: 
Home 
About
Work 
Contact
Networking
Some elements could go onto the homepage. Could have different pages for work produced in different media. 

Web standards:
Rectangle 8:6 sizing (800x600) pixels. 

SCAMP example. 

There are two things needed to make a website go live; a domain name and hosting. 
Make sure you have unlimited bandwidth (the amount of people that visit per month). 
There are a list of websafe fonts. You choose a font family so if the person viewing the website doesn't have one, it picks the next one on the list. 
If you want to use custom fonts then save them as an image. 
Colour can be selected by the colour picker and selecting 'only web colours' in photoshop. Specify colour through the hash tag code. 
FTP; can upload the file through dreamweaver.

www.kuler.adobe.com; online adobe colour picker. 

Using websafe colours means that the colour is the same on all computers. 
Size: to be accessable to everyone it needs to be 800x600. Size depends on what the website is being used for. 
We can't use images that we don't own the copyright to. 


Monday, 23 April 2012

Image: End of module self-evaluation.


1. What skills have you developed throughout this module and how effectively do you think you have applied them? 
I have developed my illustration skills throughout this module and have applied this all of my projects so this skill has developed quite well. I have began to develop more of a personal style that could be recognised as my own work. I have also become more confident with this skill because i've managed to put it into practice quite a lot. Time management has also developed throughout this project because a lot of the briefs were just one week so I had to decide what a substaintial amount of work was week on week and whether I was developing things to the best of my ability. General image skills have developed throughout this module because i've learnt the various ways an image can be produced whether it be in 3D, illustrated, photographed etc and then I have also learnt how to combine these skills. I think a range of these general skills has been applied well throughout the module because I have tried a range of techniques throughout each of the briefs. 

2. What approaches to/methods of design production have you developed and how have they informed your design development process? 
The main method of design production I have used throughout each of the briefs is illustrating the imagery I need before producing it digitally. This has informed the design development process in the sense that I then take these images to create things digitally so without them I wouldn't have a basis for all of my imagery. I have also used photography as a design development process because this was relevent to some of the briefs. This informed my design development process because it was the last stage in some of the briefs and created the final piece so it finished the process. I've also sometimes used photoshop to edit some of my imagery so that it was ready for illustrator when it came to making a final piece. This informed my development process because without editing some of the images in photoshop I wouldn't have got the same result within my final pieces. 

3. What strengths can you identify in your work and how have/will you capitalise on these? 
Illustration skills are definitely a strength throughout my work because I have become more confident with my drawing style and feel as though i'm developing something that is beginning to look like 'my own'. In future I will capitalise on this by using this skill more often whenever I am given chance in a brief, even if just for experimentation. Completing the briefs for the correct deadline has also been a strength throughout this module because if I hadn't had kept on top of the work I would have struggled to get everything done for the module deadline. In future I will make sure I manage my time just as well so that things get done and I dont have a big build up of work at the end. My ability to come up with a range of different ideas has also been a strength throughout this module because it means I have created a range of work and experimented with things I maybe haven't done before. In future I will make sure I explore a large range of ideas so that my work becomes more diverse. 

4. What weaknesses can you identify in your work and how will you address these in future? 
My work throughout this module has two main weaknesses. The first weakness is that I have not researched as much as I could have for each of the briefs. In future I will make sure I research as soon as I get a brief so all ideas I have intially are inspired by something and can be informed and developed fully by a better body of research. The second weakness I found was the amount of experimentation I did. I found that I threw myself straight into things instead of spending time coming up with a range of ideas because I didn't want to spend too much time with only having a week one most of the briefs. 

5. Identify five things you will do differently next time and what you expect to gain from doing these? 
1. Look and consider more research: My ideas will be more informed and it is likely I could come up with better ideas too. 

2. Prioritise each module that is running as high as the other: The briefs won't feel as rushed and i'll have put more effort into them. They will not be forgotten about. 

3. Develop more: I could come up with some really good ideas through doing this instead of just going with the first one I come up with. 

4. Experiment more: I could have used a range of different techniques to create final pieces. I would have a more diverse range of work and it would be more visually exciting. 

5. Use a greater range of sources for research: I may come across something I wouldn't find on the internet for example. 

6. How would you grade yourself in the following areas: 
Attendence 5
Punctuality 5  
Motivation 3
Commitment 3
Quantity of work produced 3
Quality of work produced 3
Contribution to the group 3

Saturday, 21 April 2012

PPD study task four; what is a creative CV?


Deciding how I would like to have my logo with my contact details. Works better above due to a heirarchy. 


Exploring a general layout and deciding where I would like to apply blue to fit with the logo if I decide to apply it at all. Having white space around the information works well because i'm looking for a minimalistic design approach. 

My name is also part of my logo/branding so should this be blue too? Isn't as strong blue when it's small and still works well with the larger logo when black. 


Initial 'finished' CV until...


...I realised I'd forgotten to add previous work places and references! So this is my final creative CV design. 
In a way I worked backward with this task because I created my branding for the fifth task first and then went back and did my CV so I had a style to work with. 

PPD study task four; what is a creative CV? (studios to contact)

The first part of this task indicates that I need to identify a minimum of ten studios to contact. These studios are as follows; 

Big Bite Creative
Big Bite caught my eye because the work is quite quirky and colour, something which I tend to reflect throughout my own work too. They seem like a really positive bunch of people, and most importantly, friendly. The portfolio was generally impressive as they've had a range of different clients and their website design is pretty good. An added bonus is that this studio is relatively close to home. 


Touch Agency
Touch really impressed me with the clients they have worked with such as WWF and amazon, pretty big names! It would therefor be great to get feedback from someone having this experience. The general website layout was also something that caught my eye because its different but easy to navigate around. I also really like the fact its pretty simple. The fact this company are based in Edinburgh also really interested me because it gives the opportunity to explore the industry somewhere new. 


Tubbyphunk
Tubbyphunk are another local design studio which I liked for their fresh, bold design. Some of the illustrative work really speaks to me because it reflects the direction I'd like my own work to take. 


Paul Windle
Paul Windle is definitely very high on my list because i'm a huge fan of disney and loved their portfolio. Very impressive clients. I feel because the subjects are of personal interest this is an opportunity not to be missed. I particularly liked the quirky characters they have to represent each of the team because this is unique and creates a welcoming vibe to their website. 


Room For Design
This studio is based in my home town so it's the perfect opportunity to talk to someone local and I was also intrigued but certainly in a good way! They cover some of my personal areas of interest in terms of the things they are able to produce so I could get some great advice here. 


Rubberband
This studio stood out due to some of their branding work they have created. They have managed to mix illustration skills and branding into one, something which would certainly be useful for me. I feel great advice could come from this studio and it's also another pretty local one, bonus. Another important factor that stood out was the 30 years experience they have in the industry. 


Reluctant Hero 
This studio was pretty different to the ones i've looked at previously but definitely in a good way. The overall style of illustration etc is really unique and impressive to say the least. As certain elements are to be applied to clothing I imagine they are the sort of things I would purchase if I came across them so having the 'like' factor already makes this studio of interest. 

I would also like to contact a few freelance illustrators due to my huge interest in illustration. Obviously it's not possible to visit but I will create some questions that will inform me on what its like to be freelance. The illustrators are as follows; 


Vicki Gausden
Although childrens illustration is not currently an area of personal interest, I really liked the work of this illustrator because its bright, bold and really simplistic yet effective. The overall style is really enjoyable and something I can relate to in terms of my own. The hand drawn lettering was also really impressive and something I again, enjoy doing myself so I see a lot of my personal interests within the work of this freelancer. 


Chris Jevons
Really impressive character designs were found on Chris' website. The style is so quirky and creates some brilliant pieces. Particularly liked the E4 sting as this is something I worked on in one of my own projects, it was good to see someone elses take on it. There was a lot of good feedback left for this freelancer so he seemed an appropriate person to approach. 


Sophie Elm 
Sophie's design is closer to my own in the sense it tends to be handdrawn so I could really get a feel for how the work can be made desirable and what can be done with this skill. The fact illustrations have been applied across a number of surfaces is really impressive and creates a unique edge for this freelancer.